Copy a SQL database
How to copy a SQL database between evironments
Overview
This guide will walk you through the procedure of copying a SQL database between environments using the Jelastic GUI.
Export the database
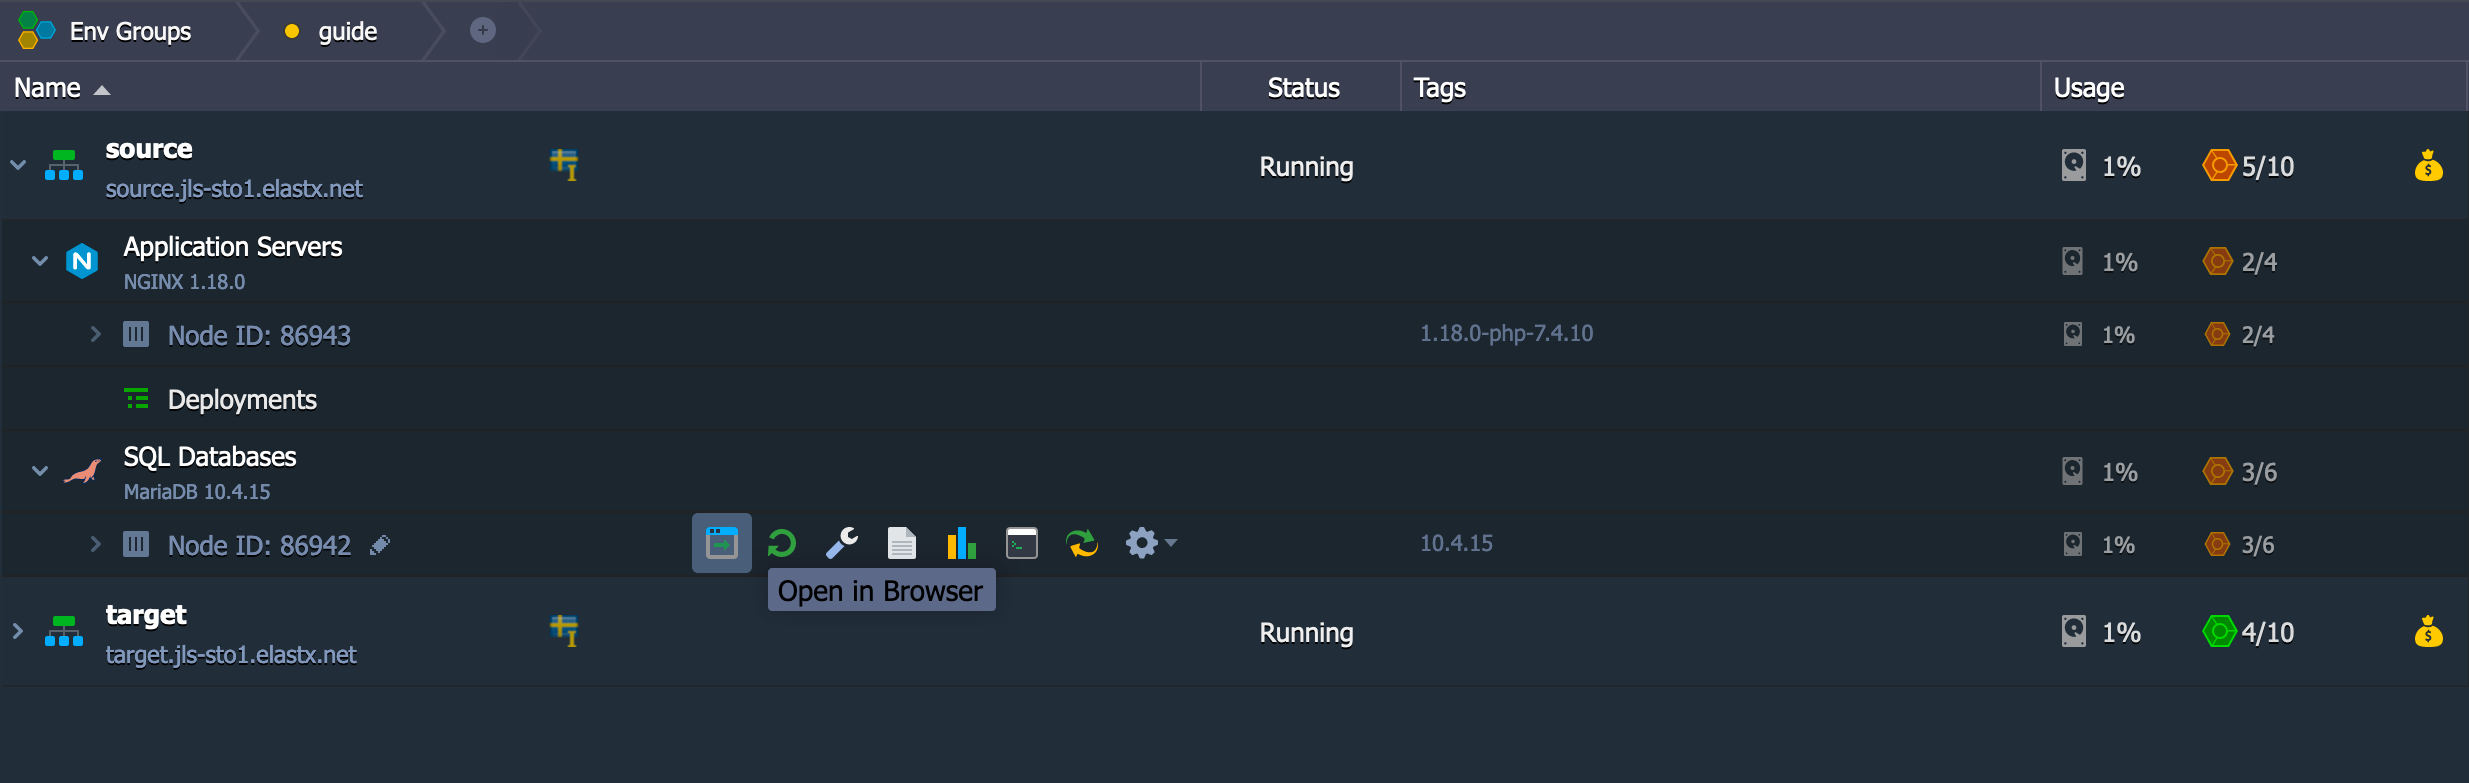
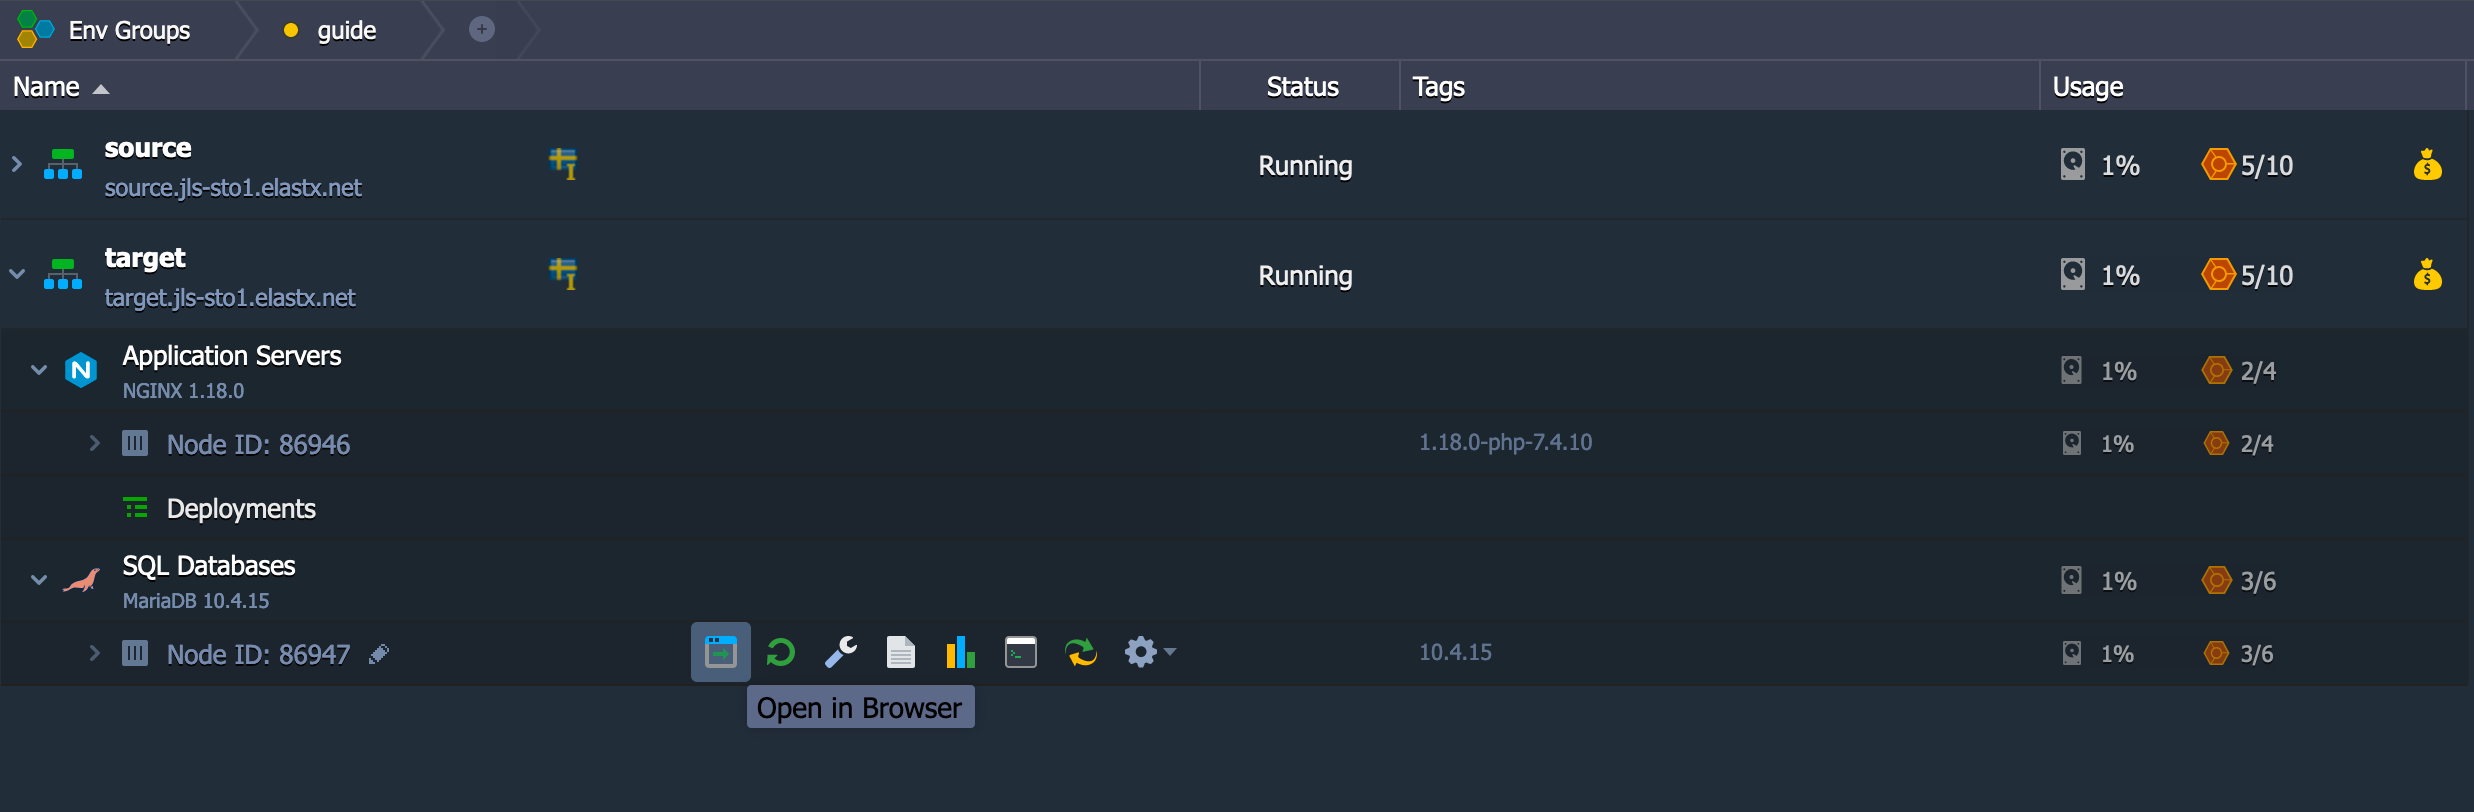
- Open up phpMyAdmin on the source environment by clicking the icon as shown below
- Export the database by first choosing the database to the left, in our case example, and then click on Export on the top navigation bar. Make sure to check the box where it says “Save on server in the directory /var/lib/jelastic/phpMyAdmin/save” and then click “Go”.
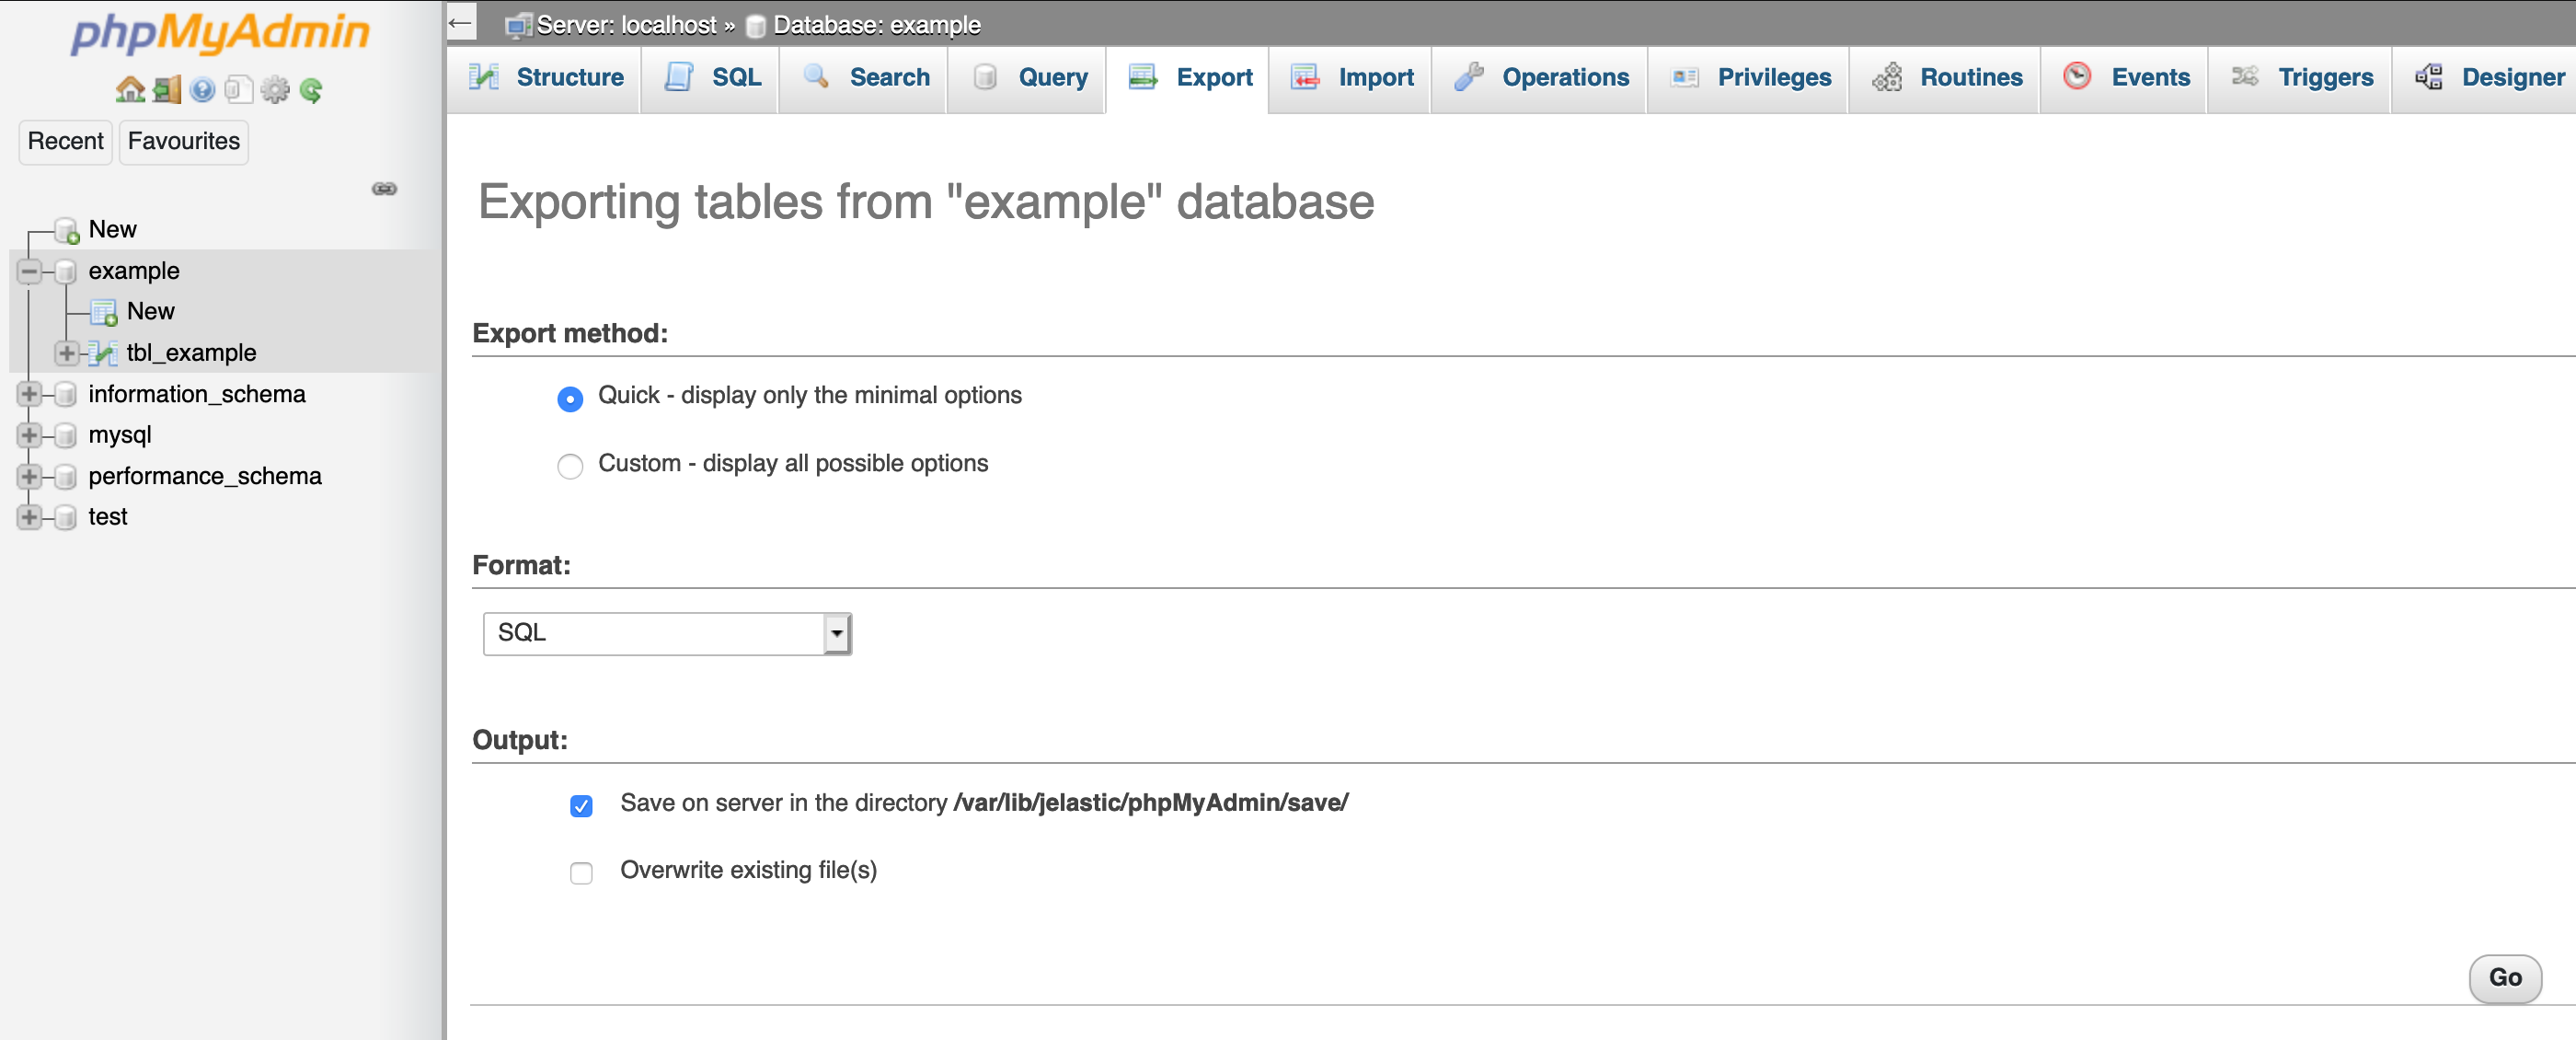
- Now you have exported the database.
Share folder between environments
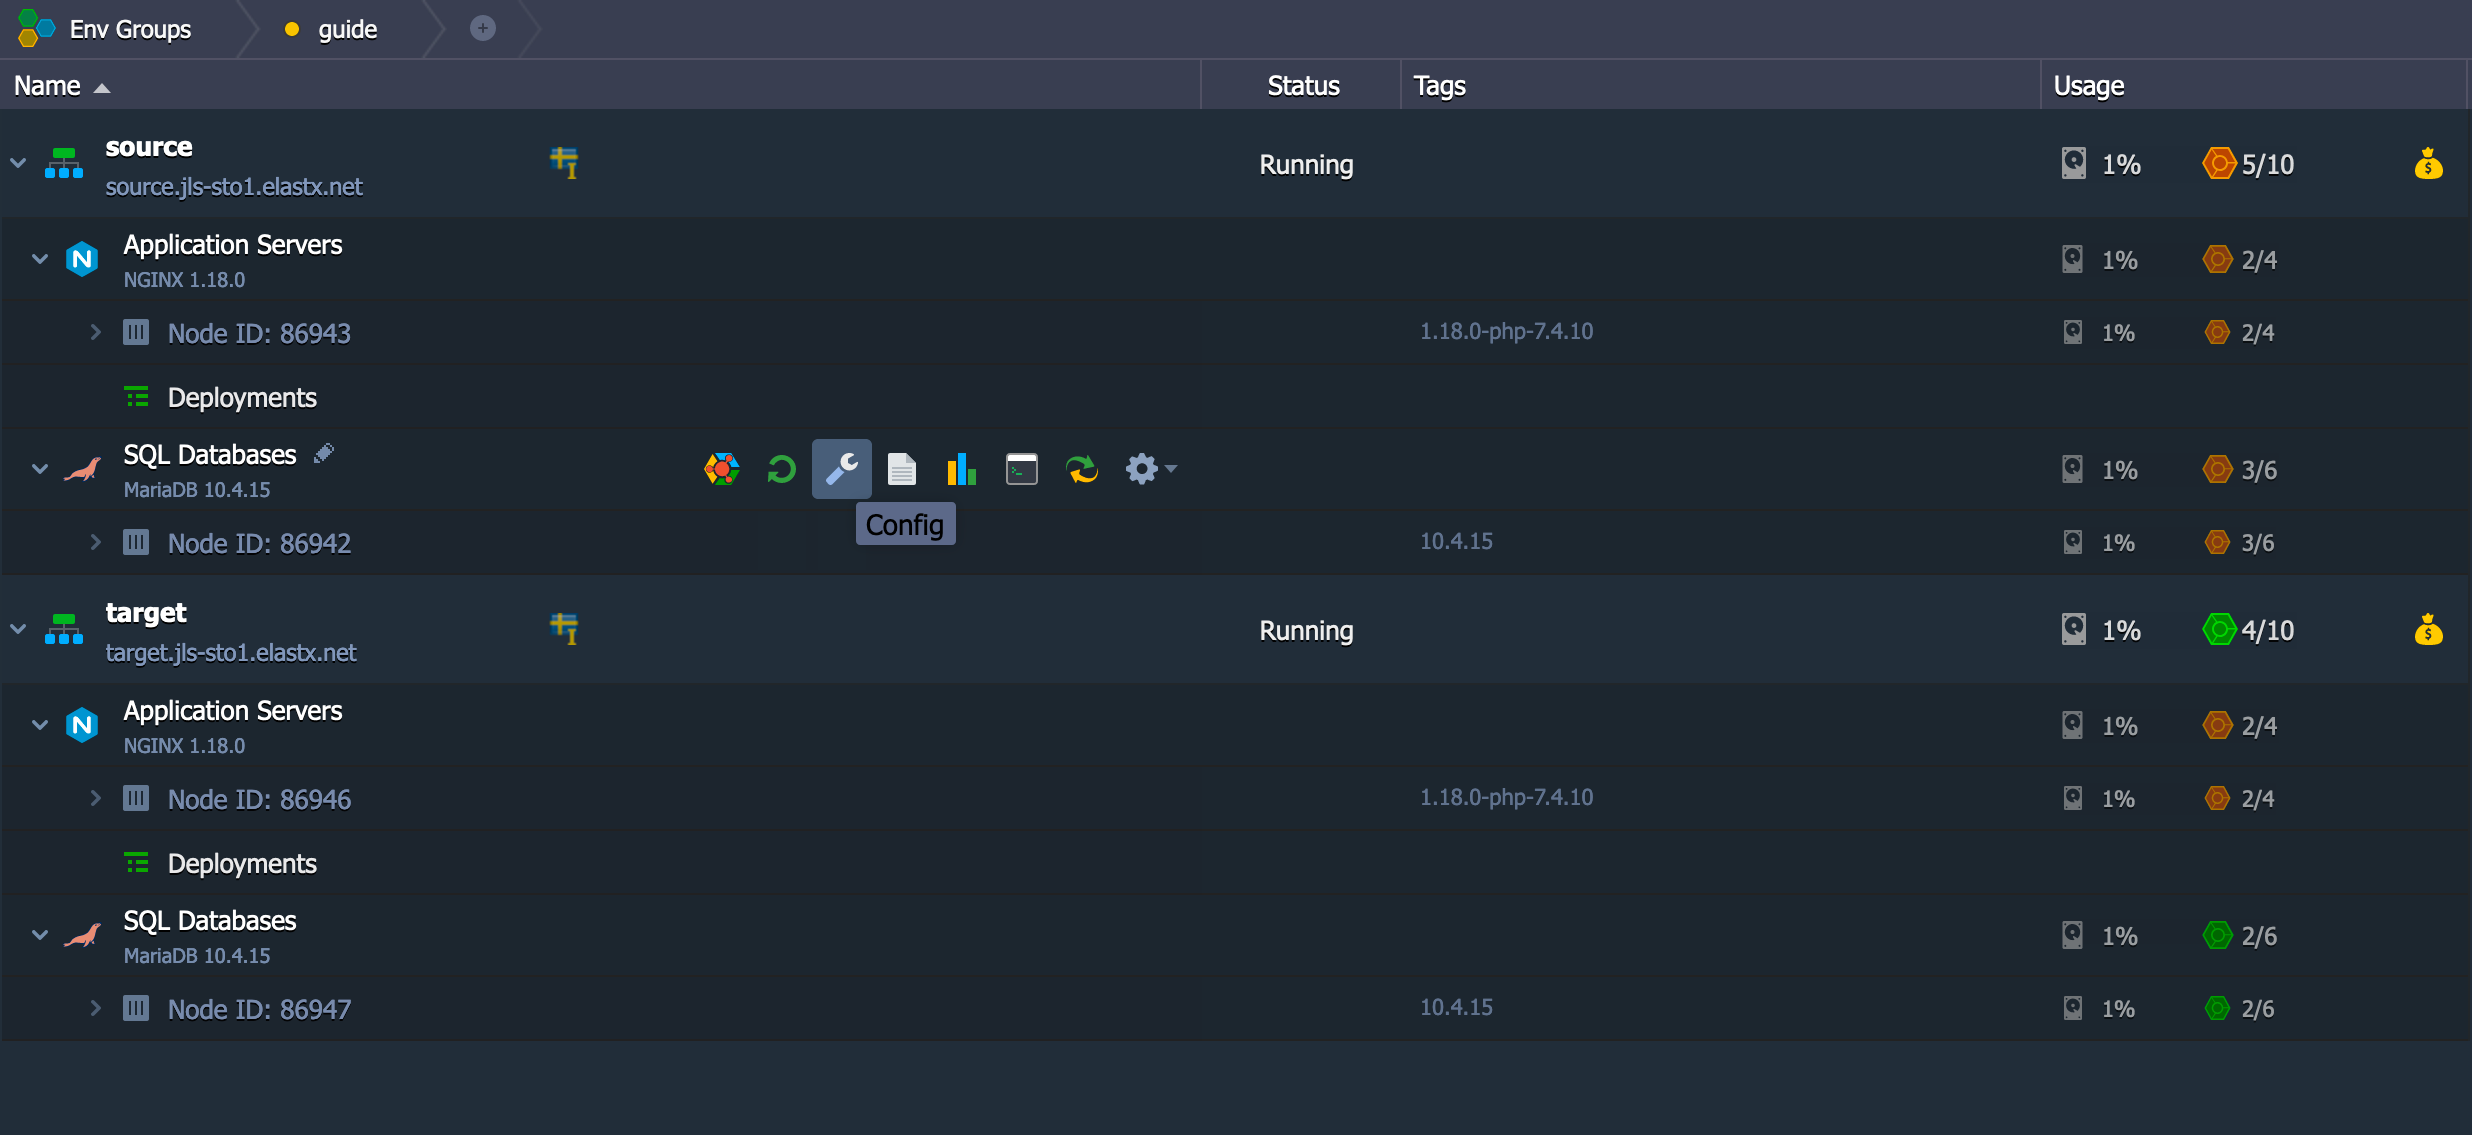
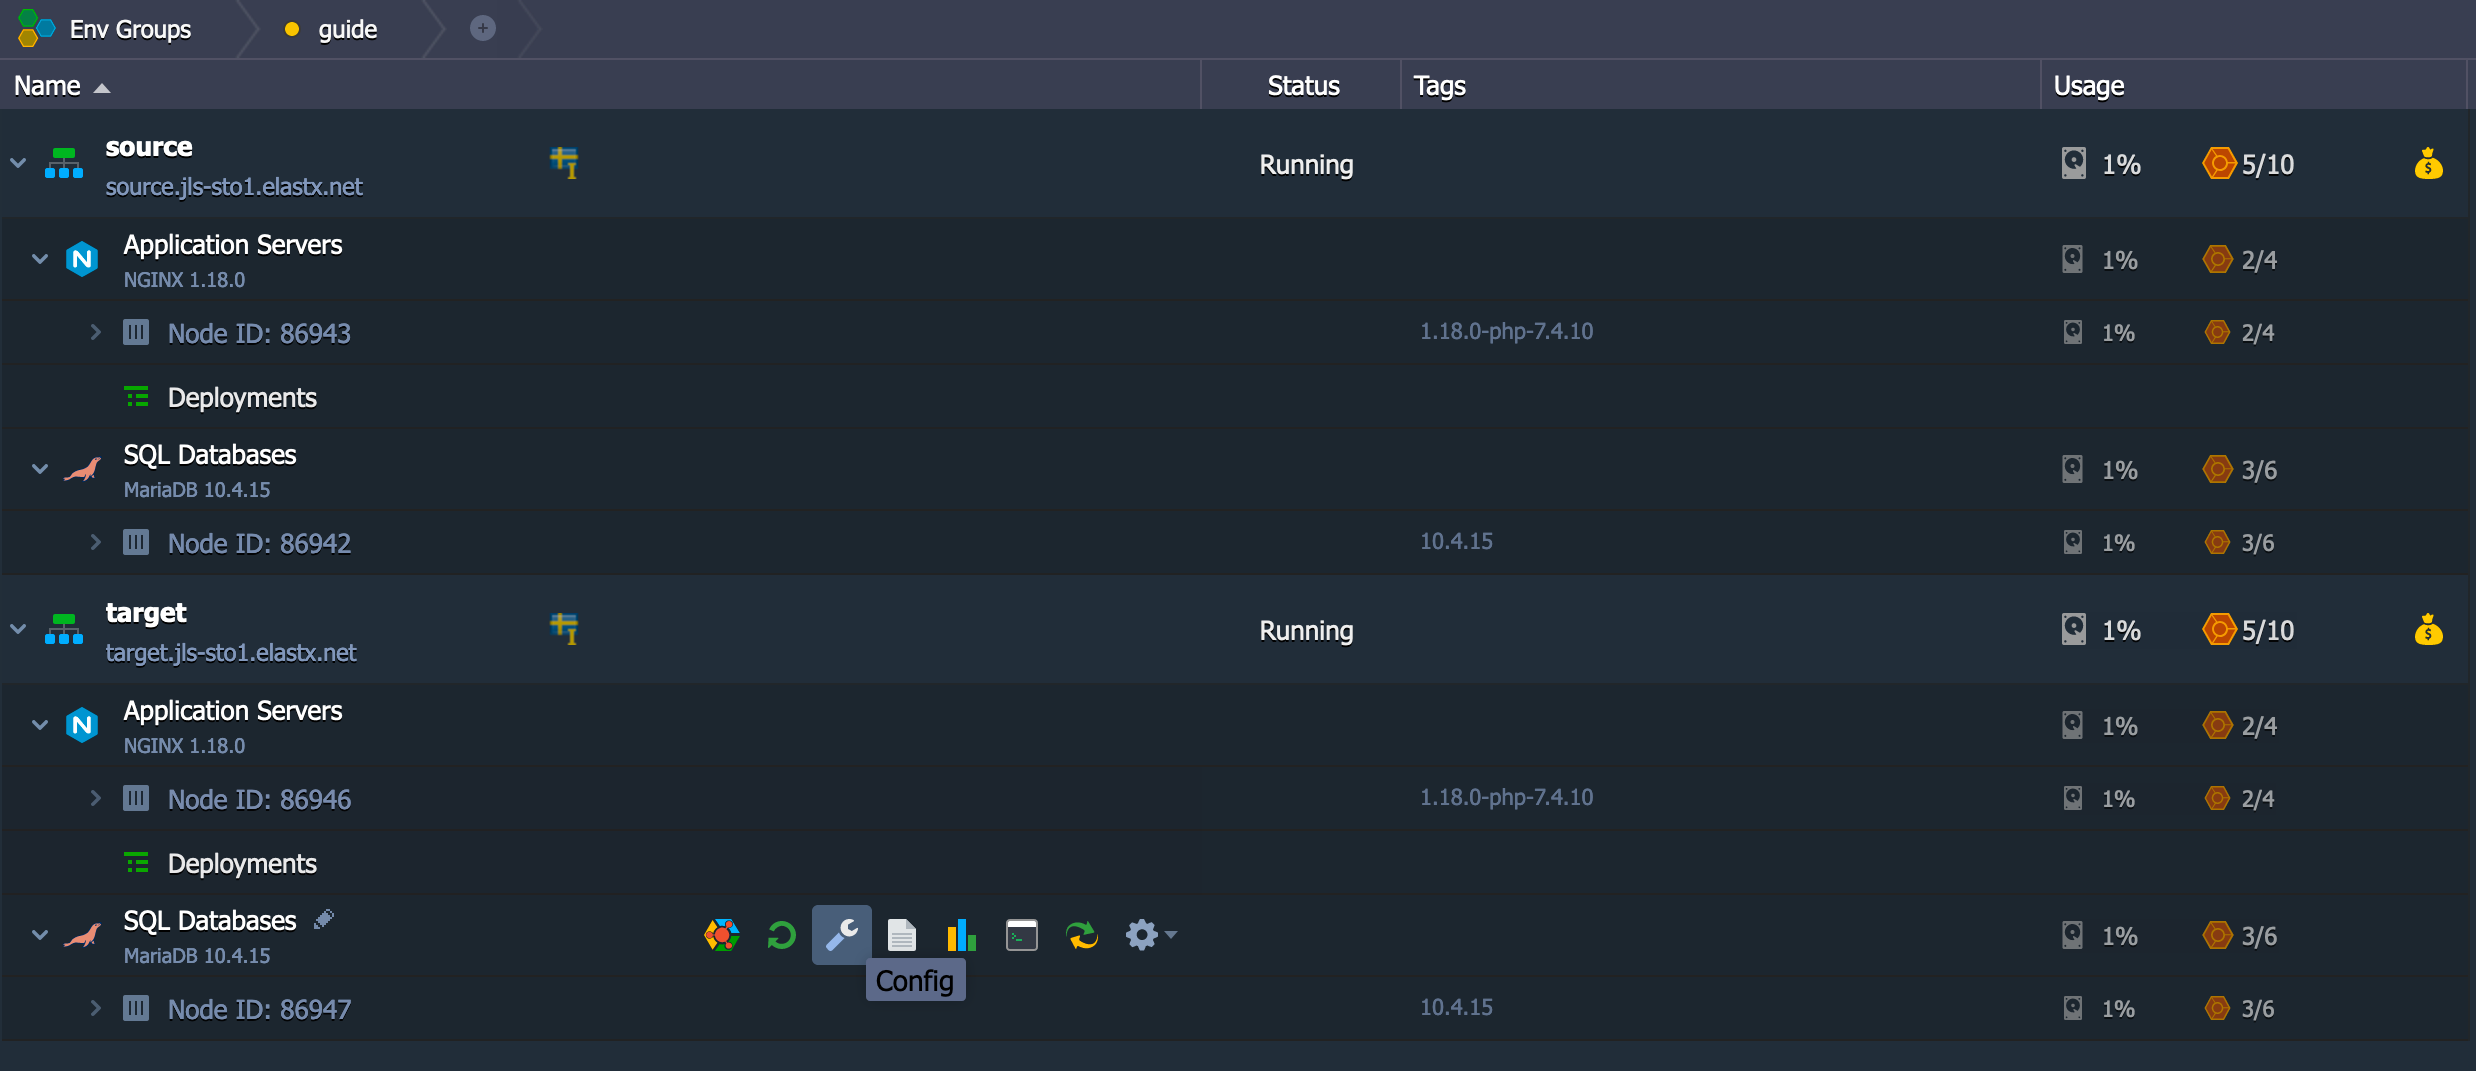
- Find the configuration wrench on the SQL Databases source node.
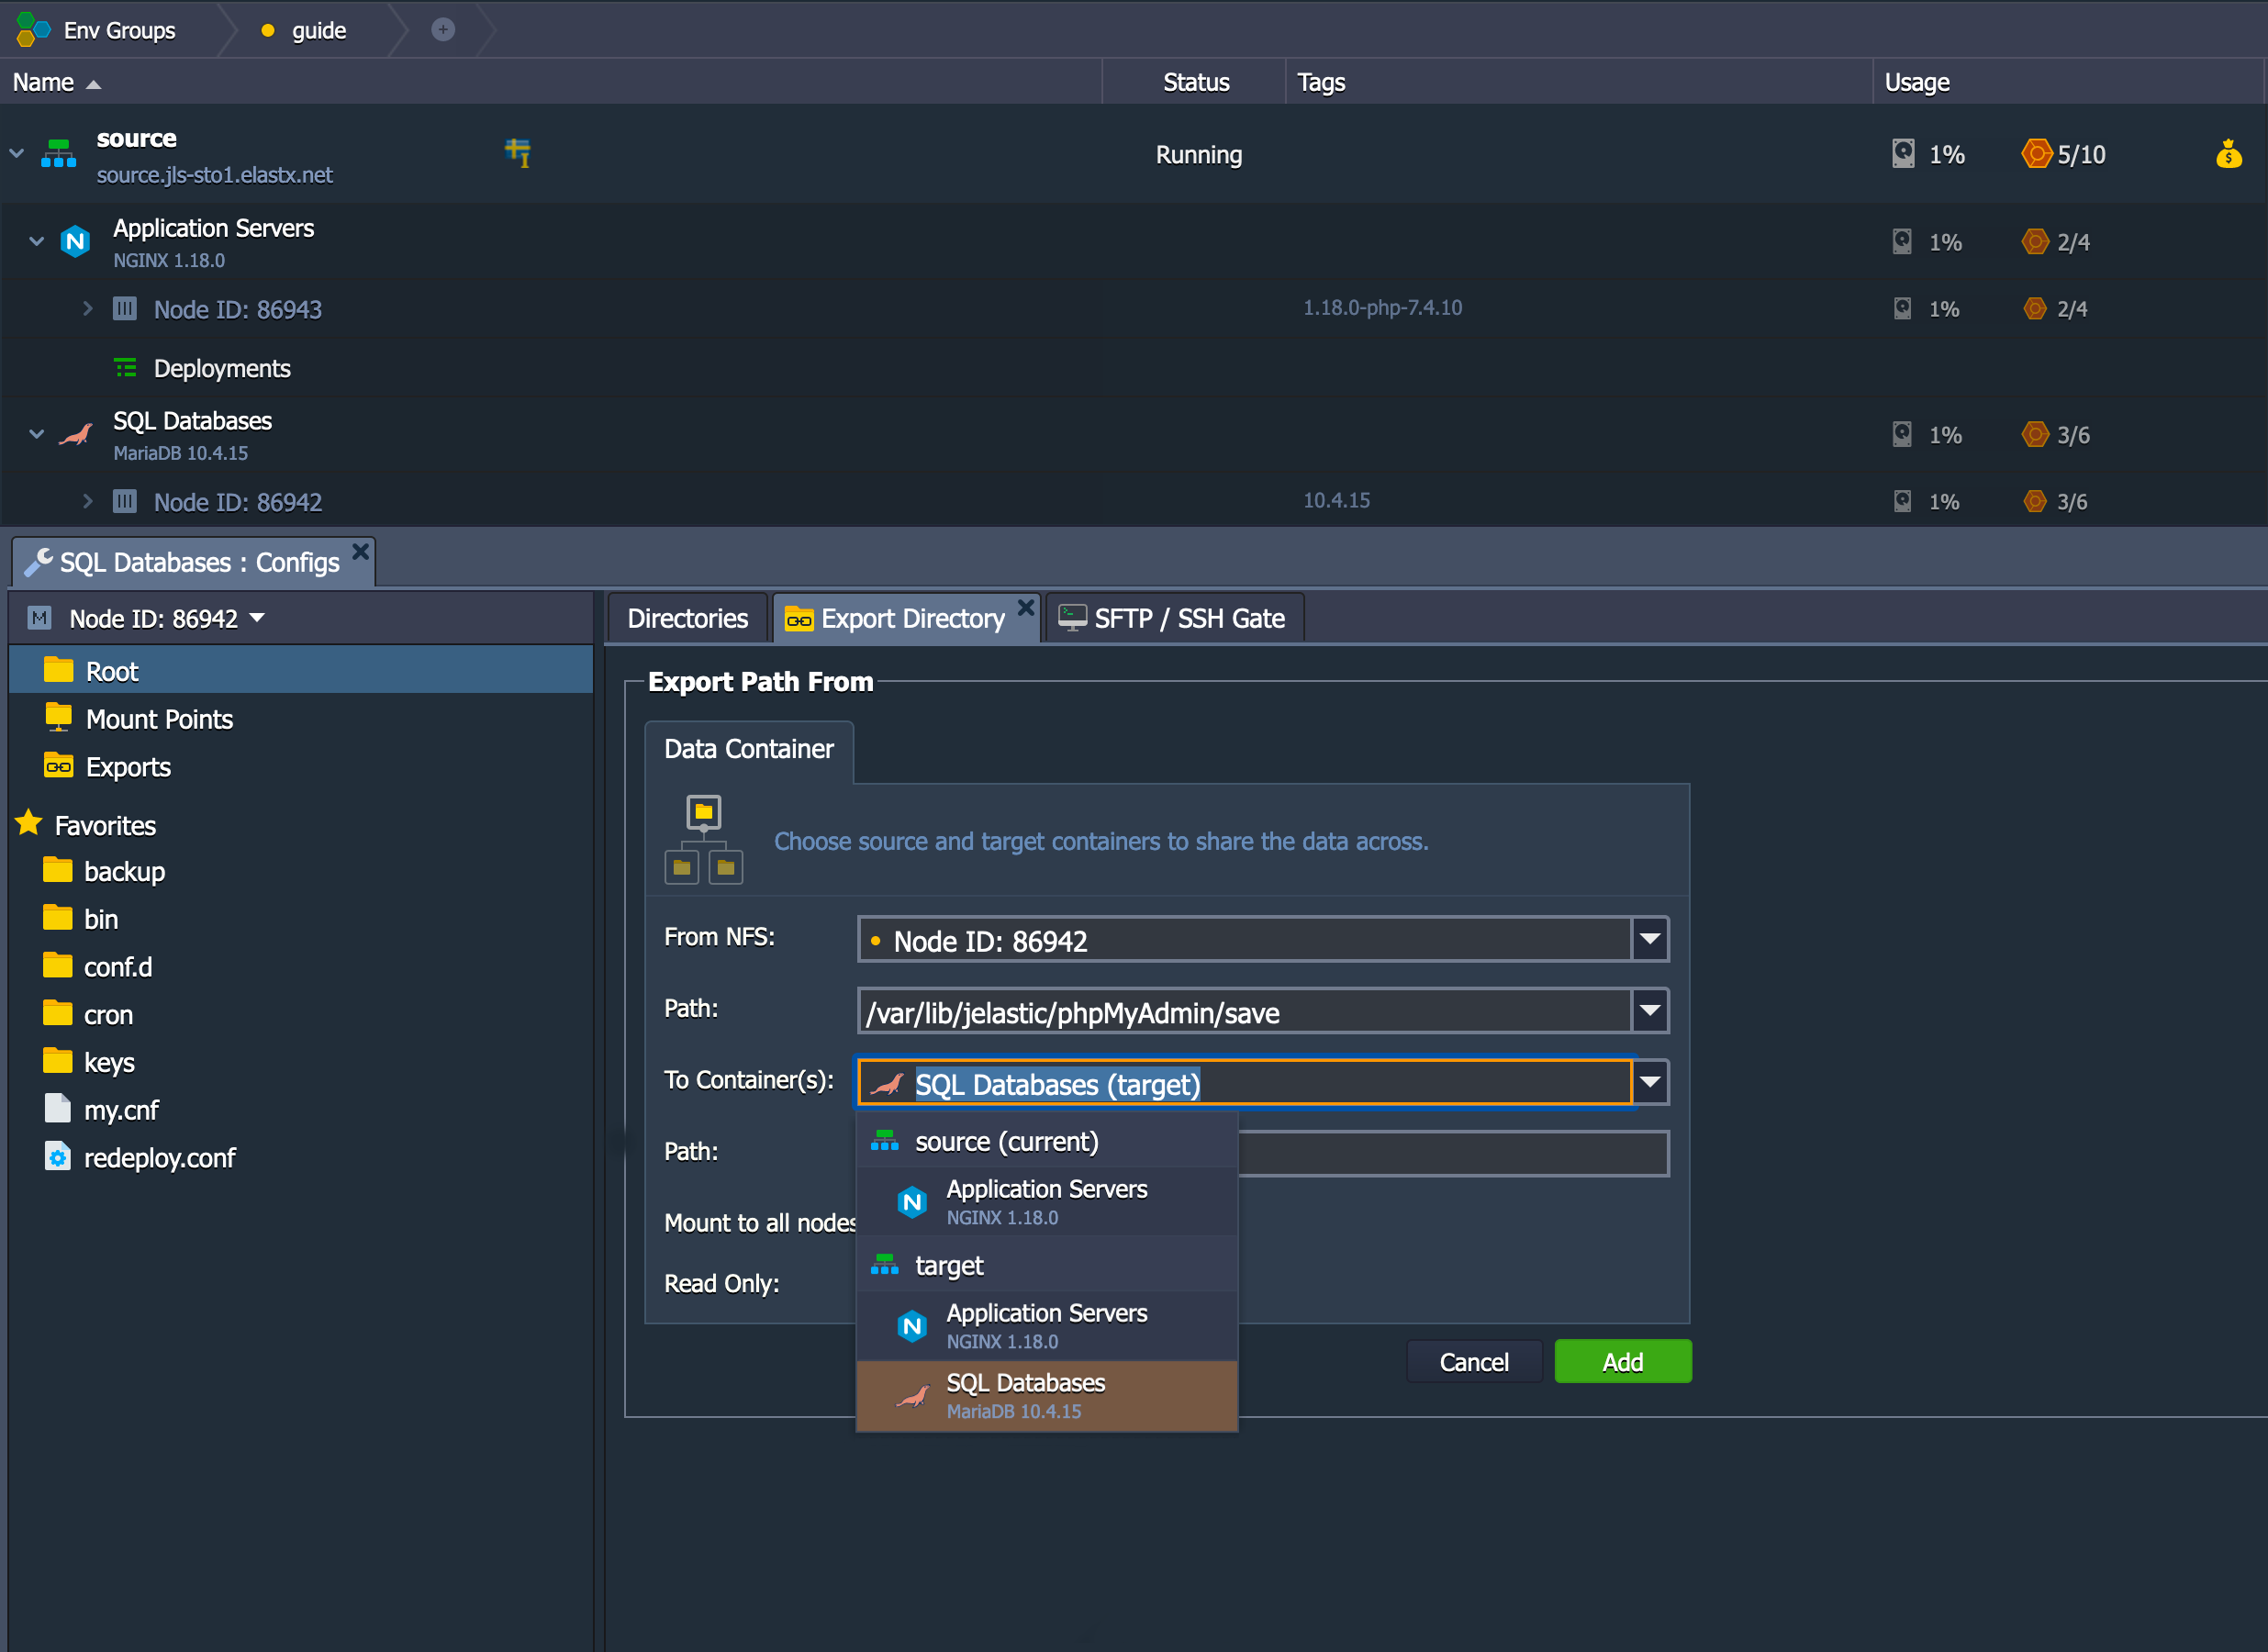
- Go to folder /var/lib/jelastic/phpMyAdmin. Click the cogwheel on the save folder as shown on the image below and choose Export
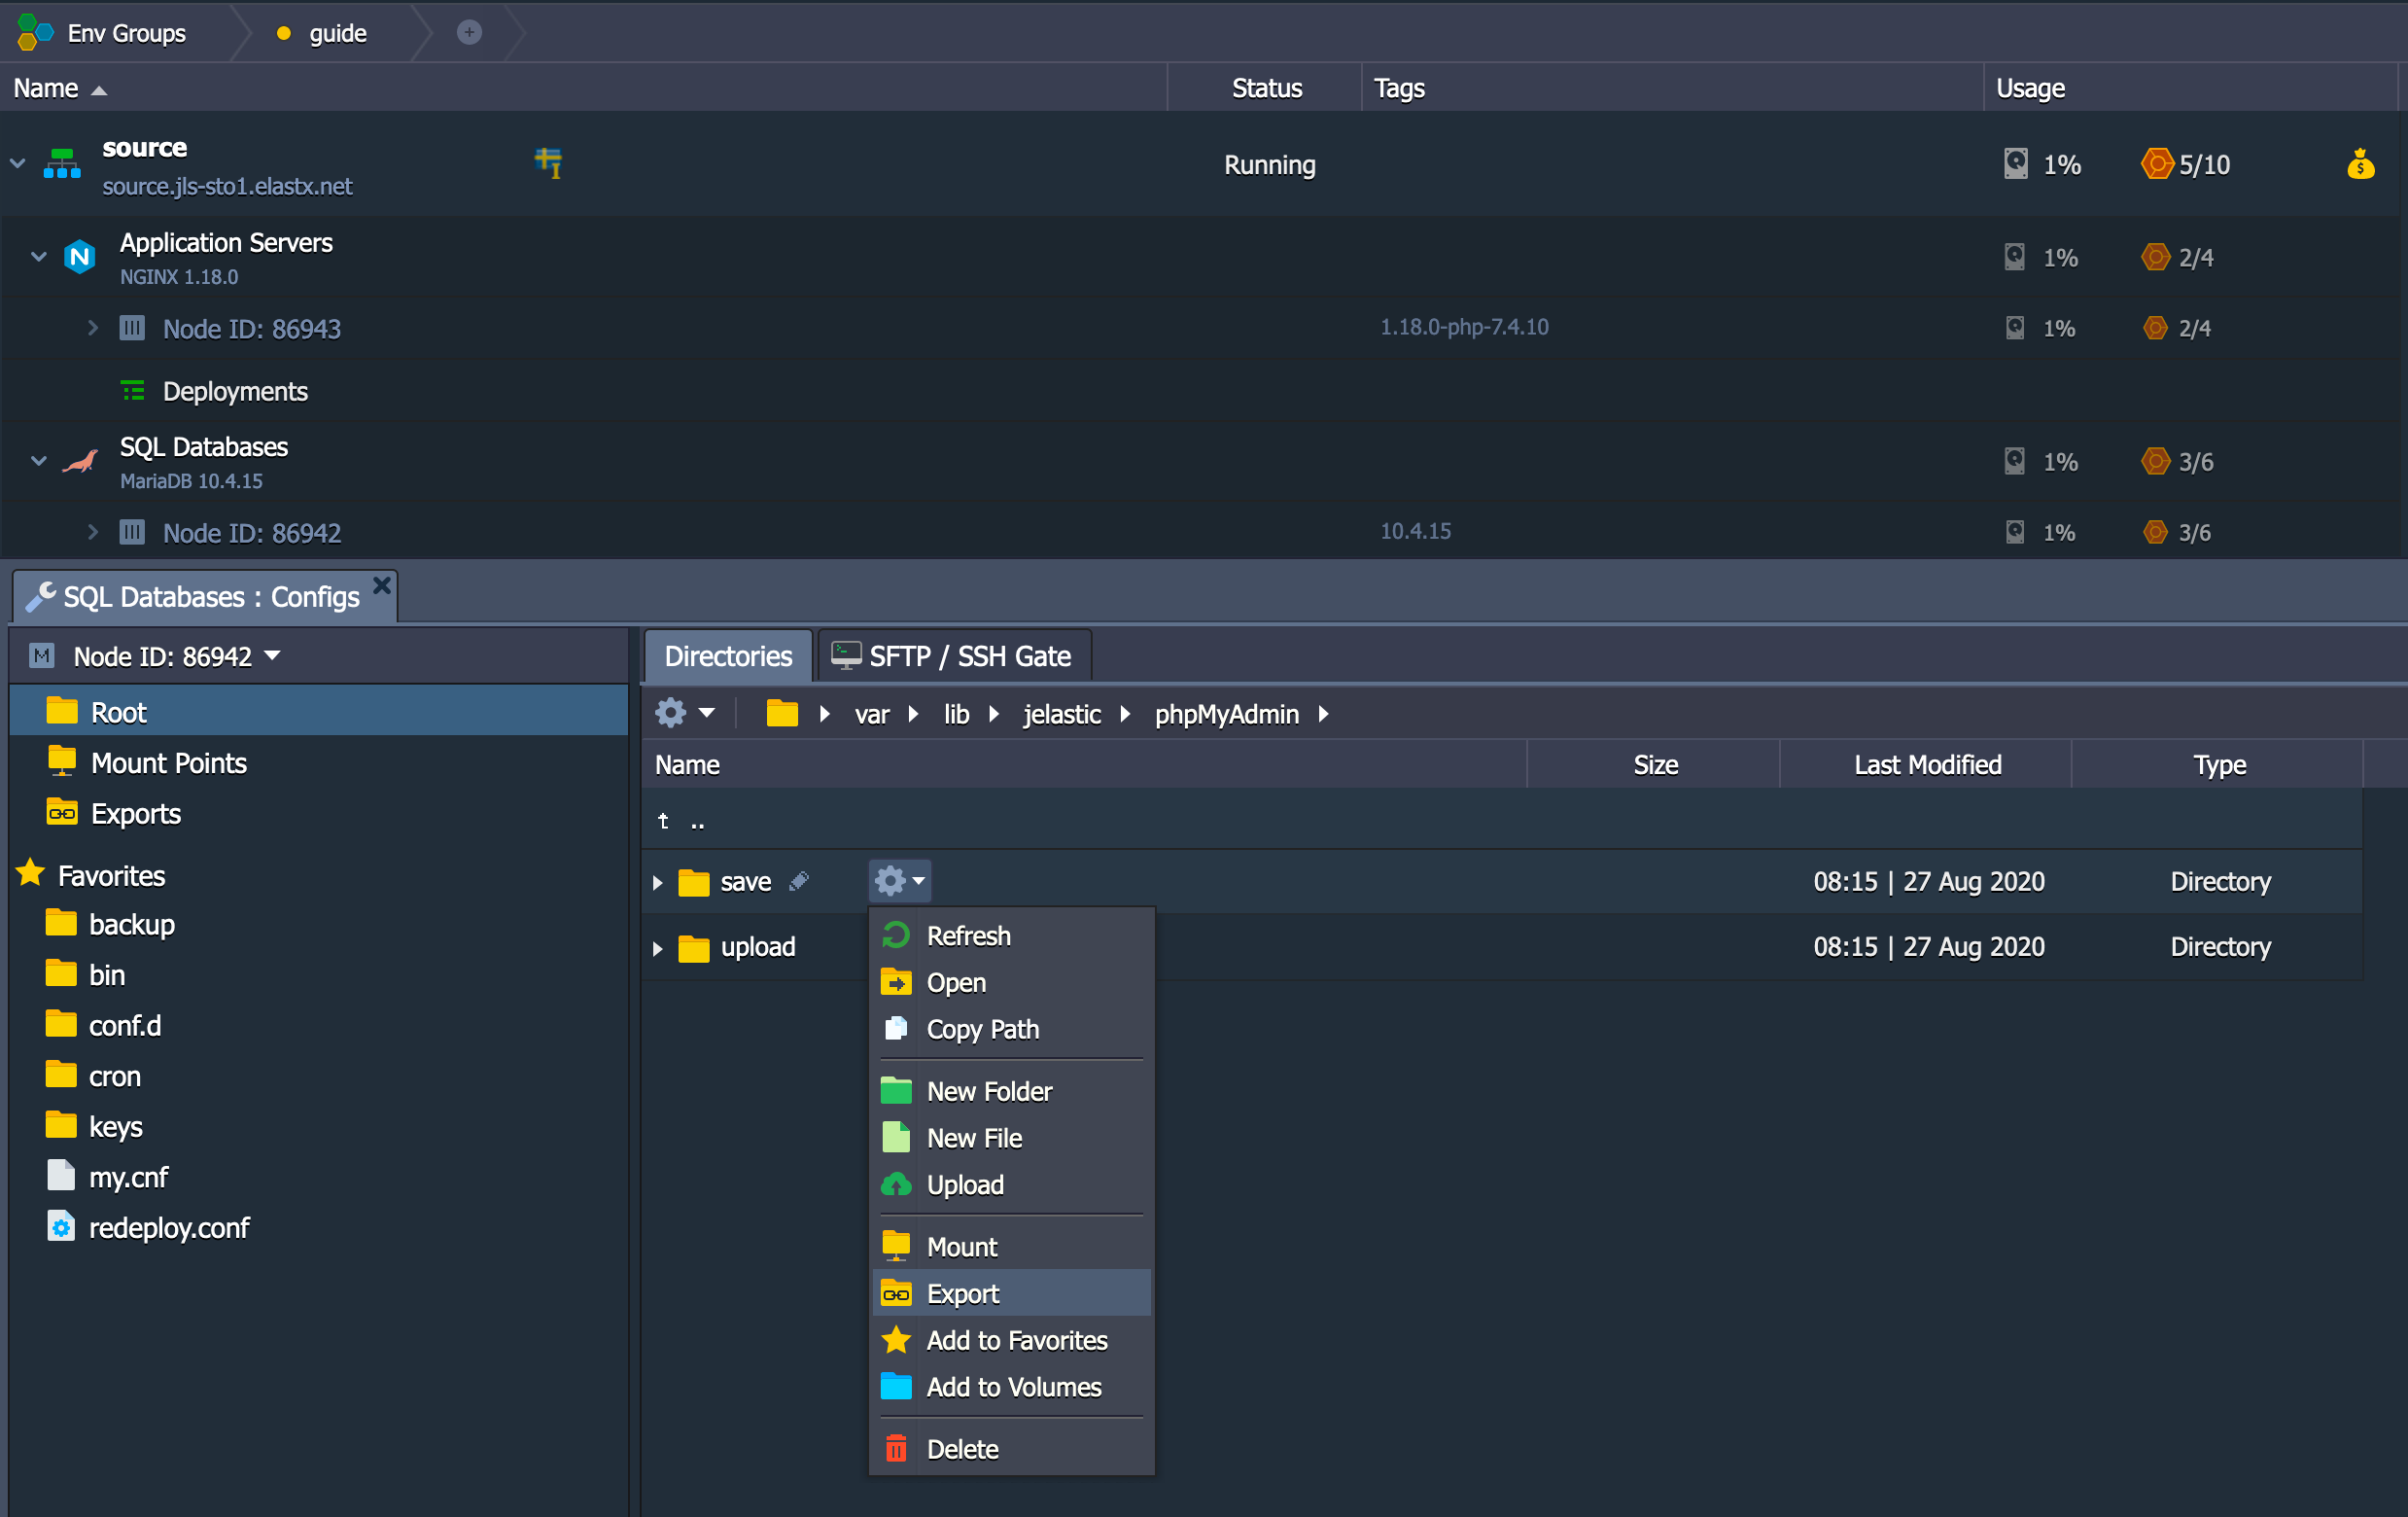
- Make sure to choose the correct target container where your target SQL database is at.
- Make sure to use the path /var/lib/jelastic/phpMyAdmin/upload
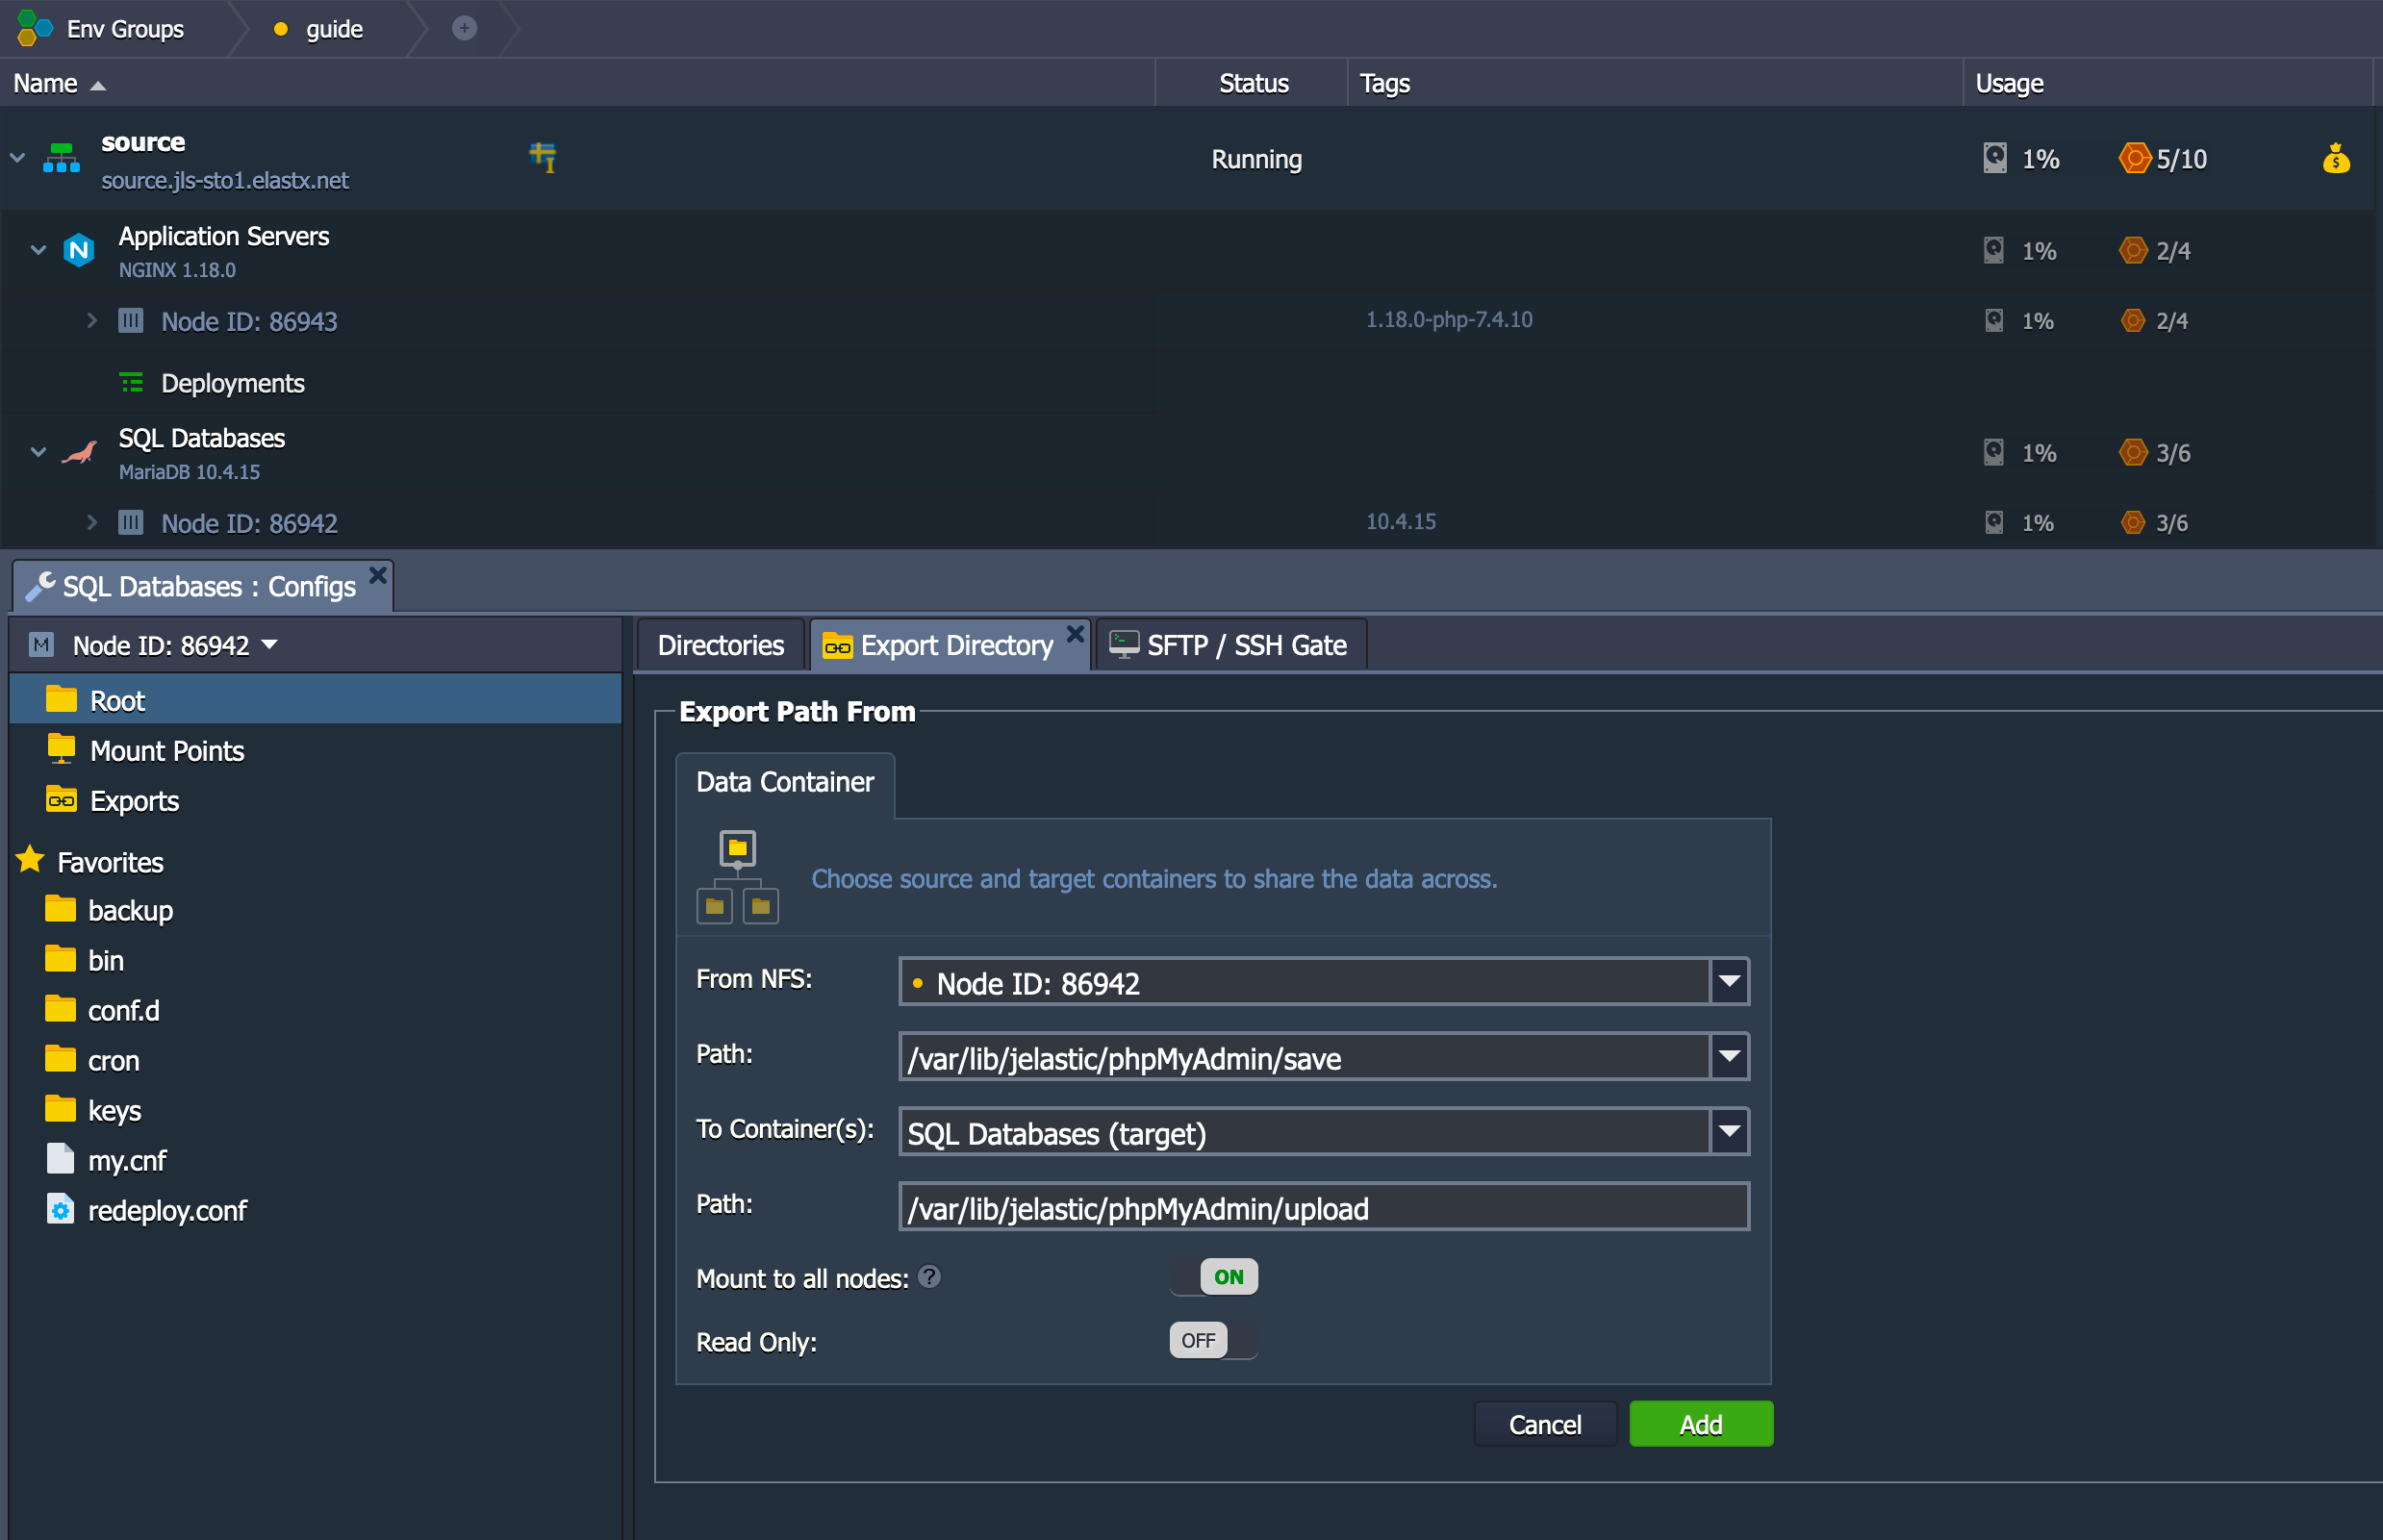
- Now the target environment should have access to a folder on the source environment.
Import the database
- Open up phpMyAdmin on the target environment.
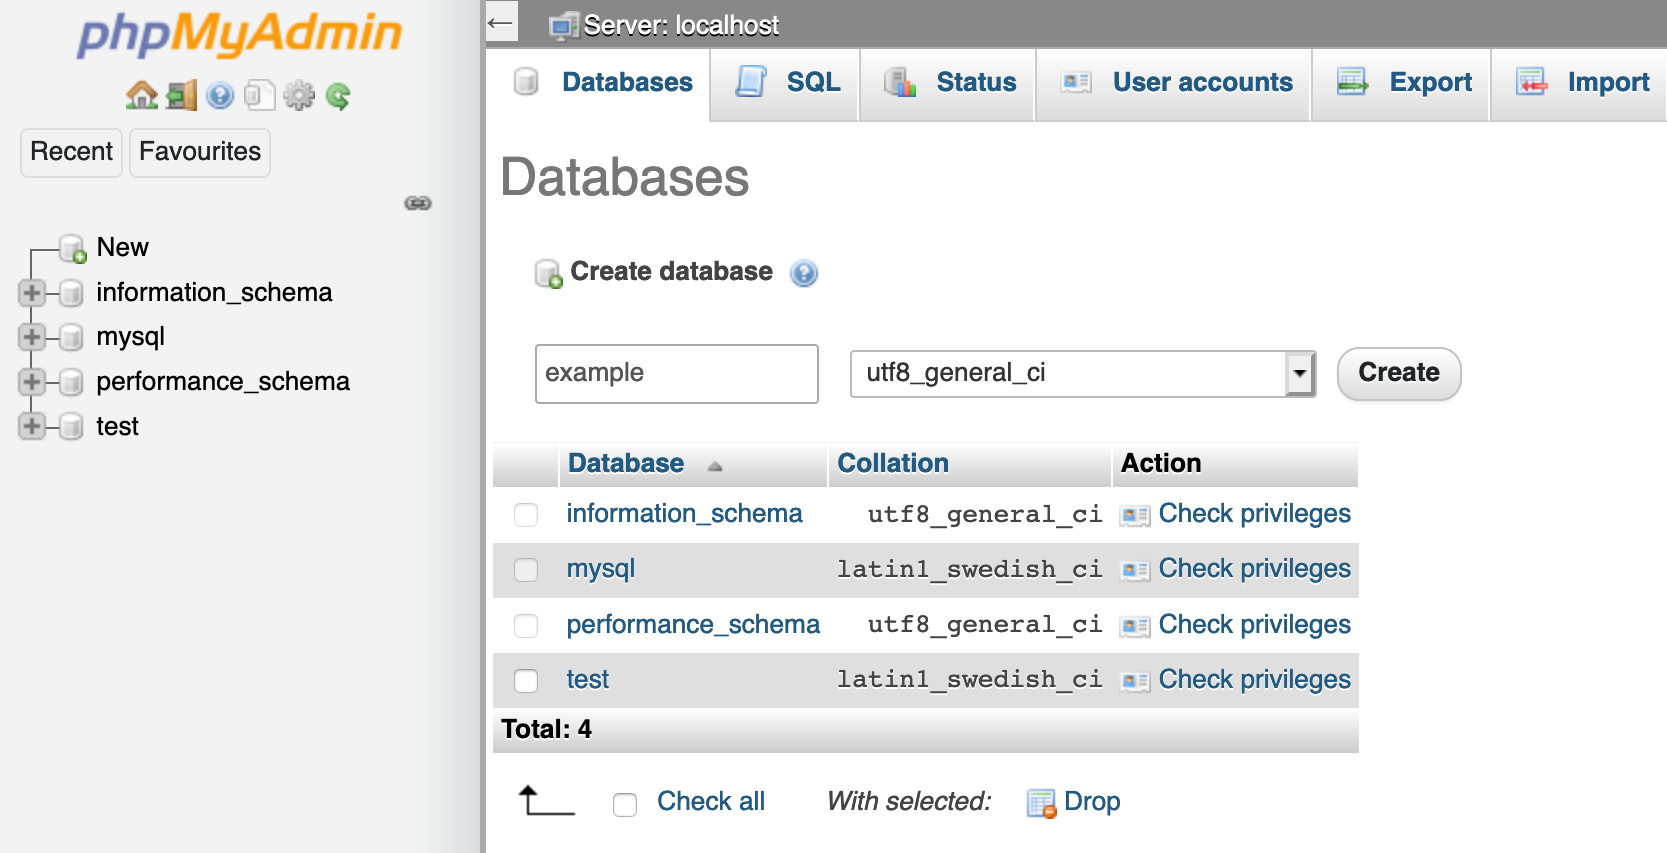
- In order to import the database, we need to create it beforehand as shown below.
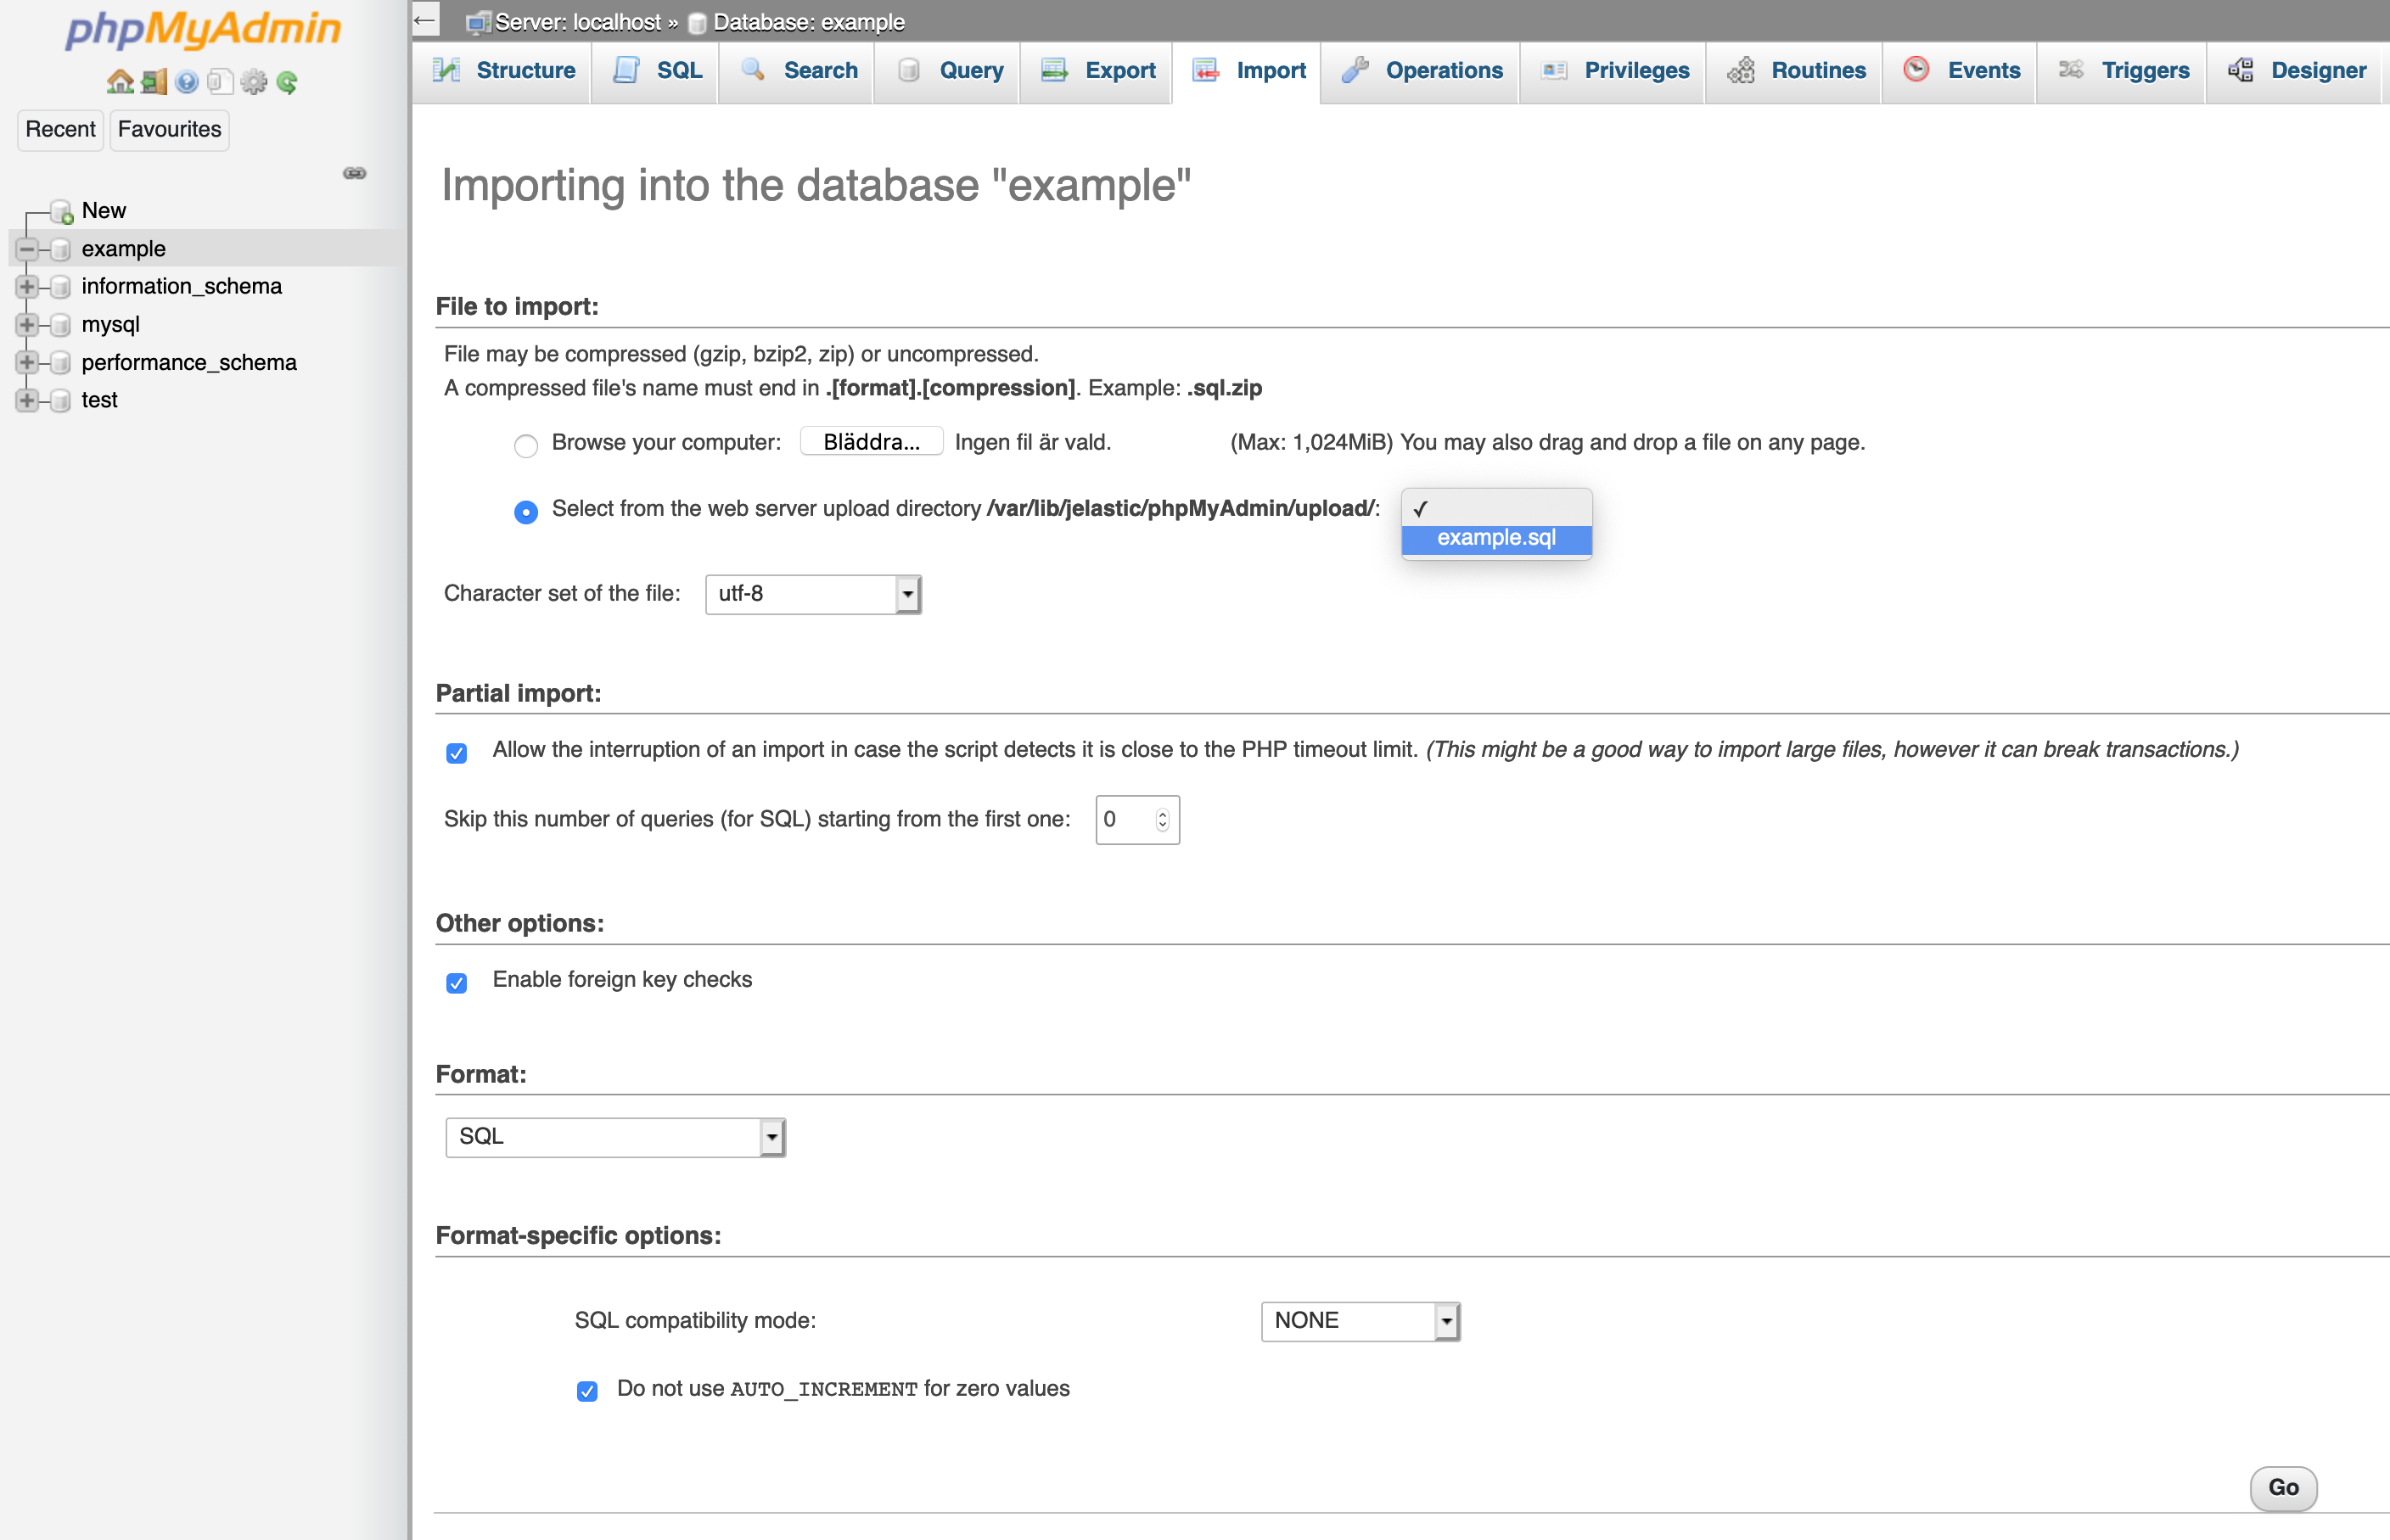
- Since you have mounted the source environments save folder to the target environments upload folder, you have access to the sql files there. So click on “Select from the web server upload directory /var/lib/jelastic/phpMyAdmin/upload/” and click Go to import it.
- At this time, you should have a successful import.
Cleanup - unmount the shared folder
- When you are done exporting and importing databases, you should remove the shared folder. Click on the wrench on the target environments database node.
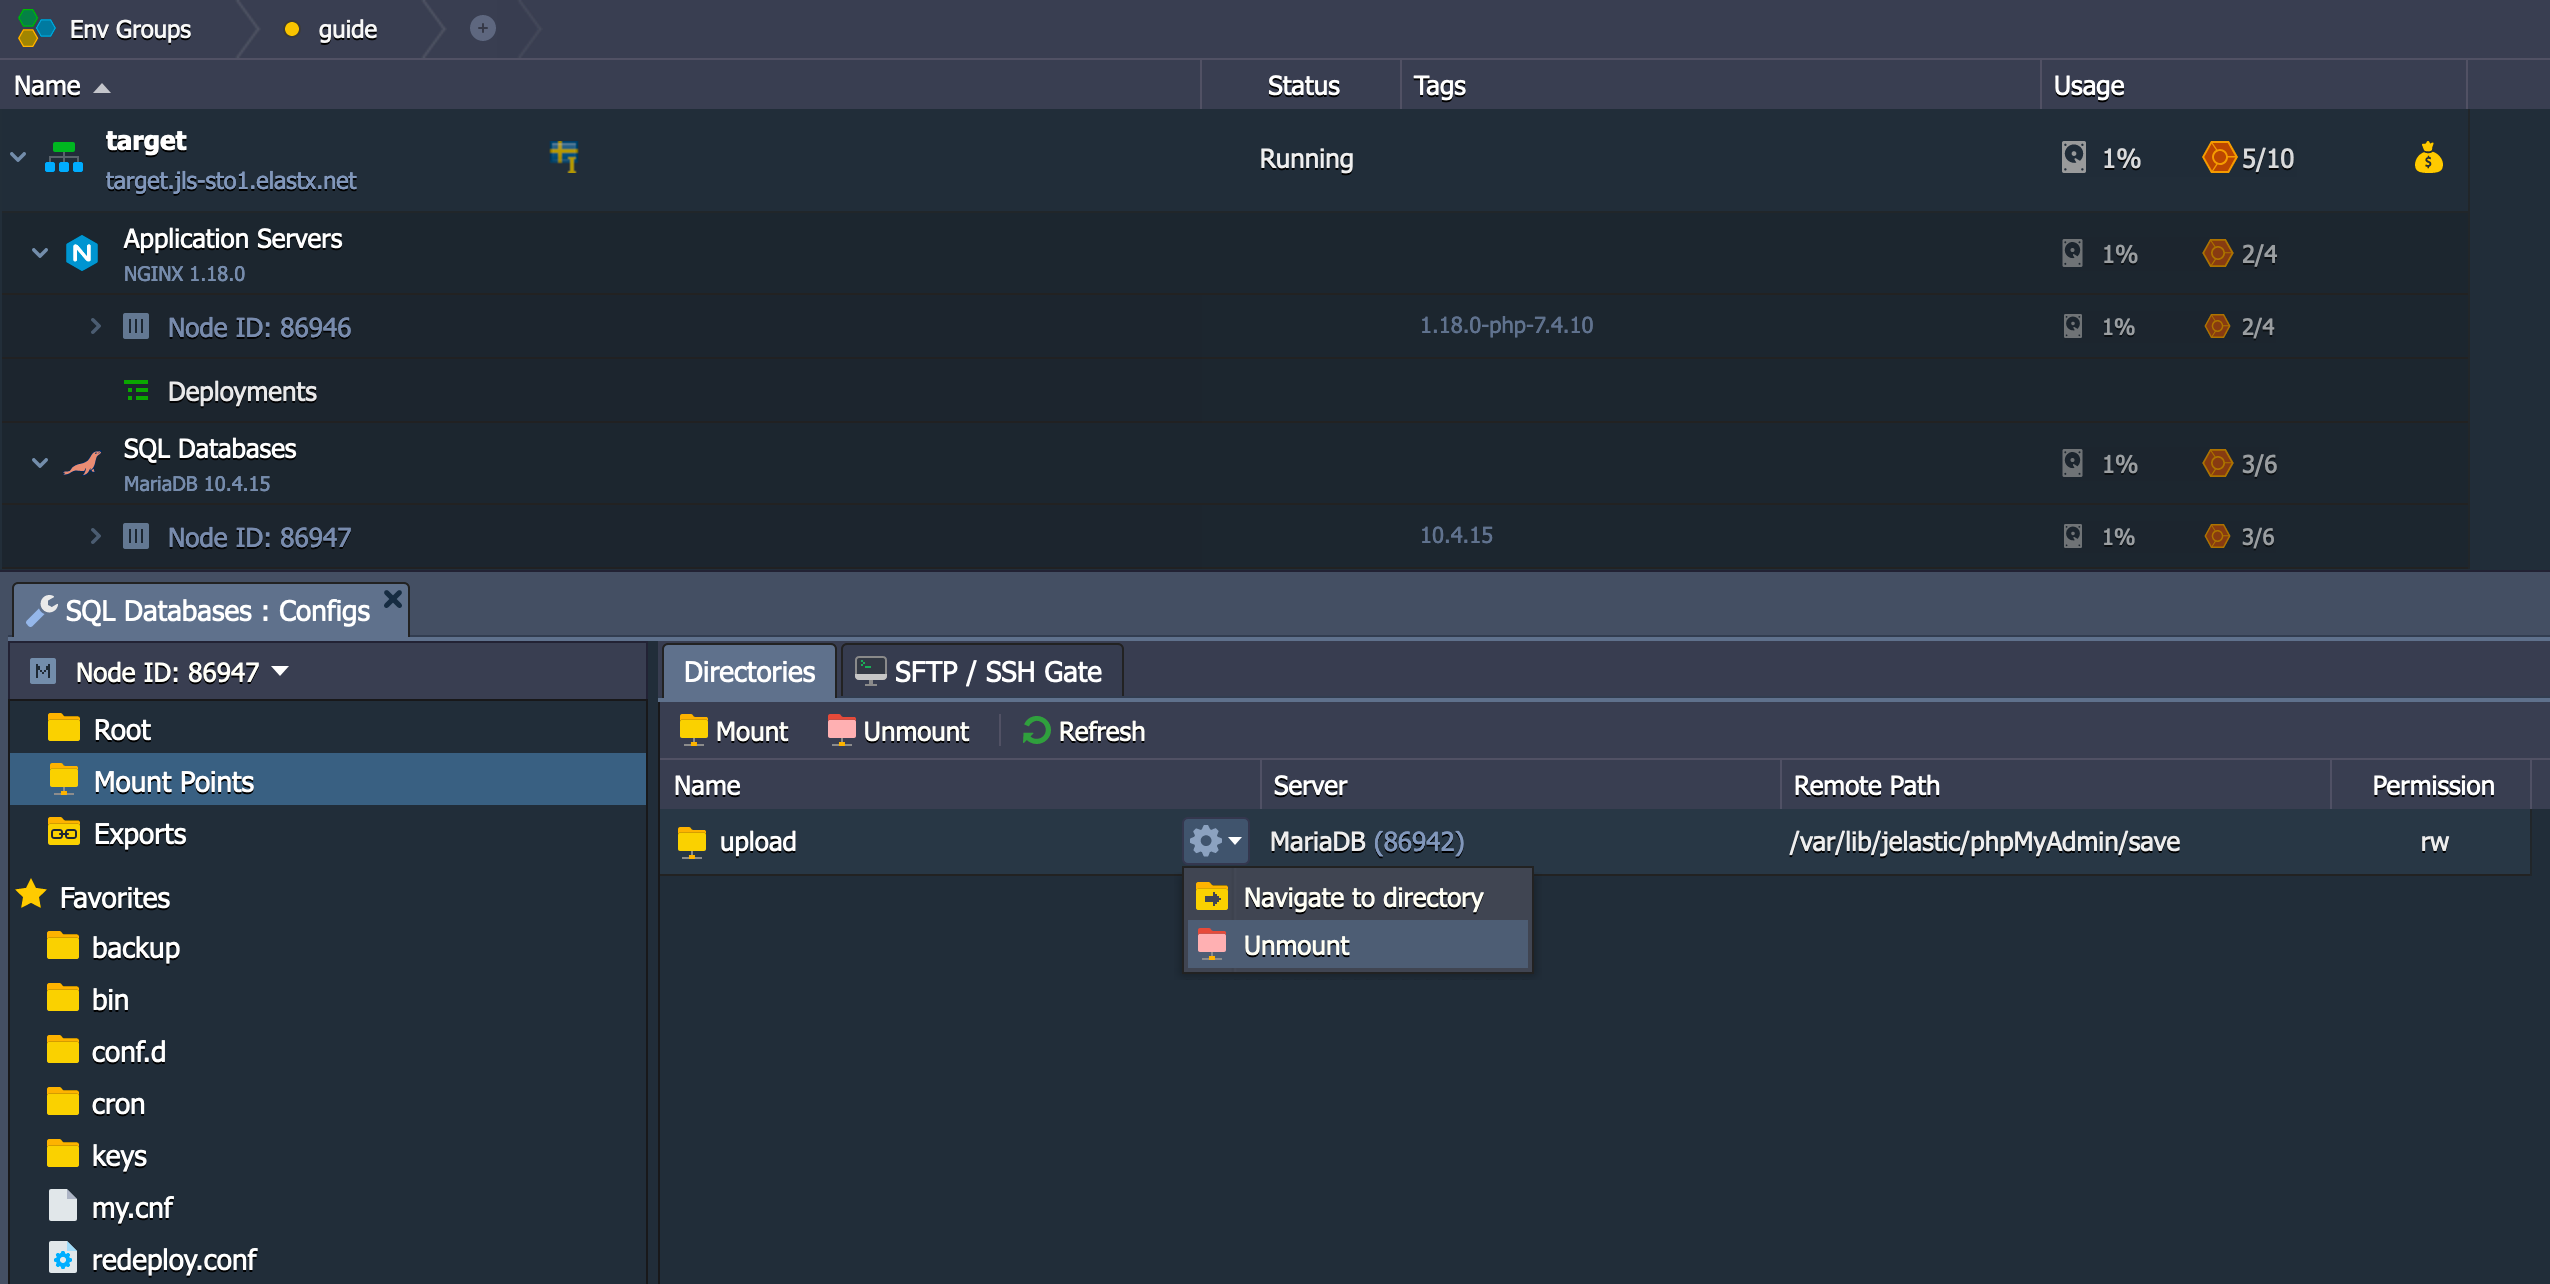
- You should see the upload folder in your Mount Points folder below to the left. Click the cogwheel and unmount, as shown in the image below
You should be all set!